Beverages
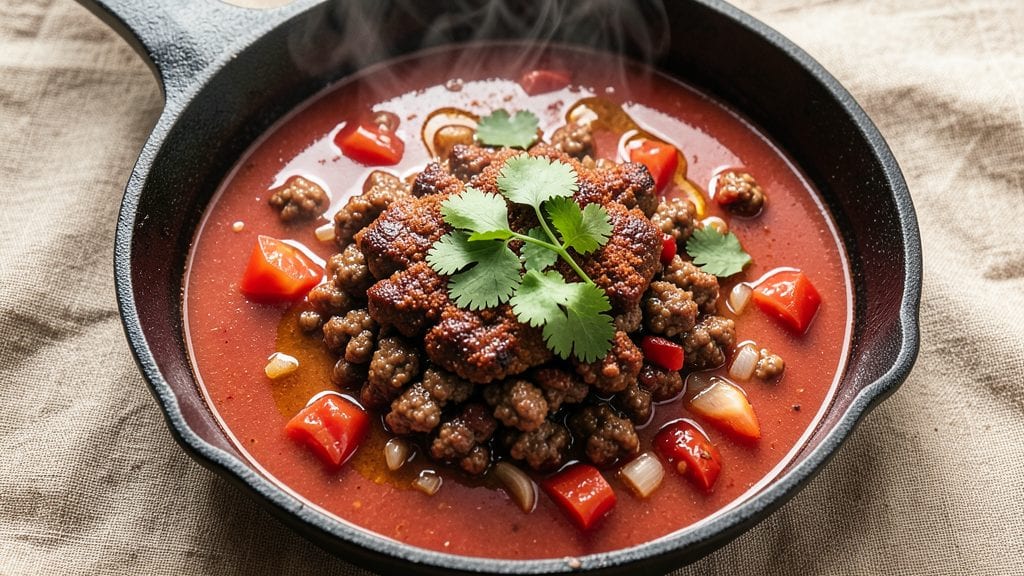
This chili recipe with tomato juice and tomato soup delivers restaurant-quality depth without a single extra can—just two pantry staples transforming a simple pot into something rich and complex. The secret lies in balancing acidity and umami, where tomato soup adds body while tomato juice brightens the flavor profile.
I developed this version after years of chili experiments, finally cracking the code for a sauce that's both hearty and vibrant.
The beauty of this method is its flexibility—swap ground beef for lentils, add smoked paprika for depth, or keep it vegetarian with extra beans. With just 30 minutes of active prep and 2 hours of simmering, you'll end up with a chili that's foolproof yet packed with professional-level flavor.
The tomato components work together to create a sauce that's velvety yet bright, with layers you won't find in canned versions.
What makes this chili truly special is how the tomato juice and soup interact during cooking. The soup thickens naturally as it simmers, while the juice prevents the dish from becoming too heavy.
By the time you're done, you'll have a pot of chili that's smoky, tangy, and deeply satisfying—perfect for weeknight dinners or meal prep. The aroma alone will have everyone asking what's for dinner.
Serve with crusty bread to soak up every last drop, or top with avocado and cilantro for freshness. This recipe proves you don't need fancy ingredients to create something extraordinary—just the right technique and a well-stocked pantry. Let's get cooking!
Ingredients for chili recipe with tomato juice and tomato soup
Two pantry staples and a handful of spices—this chili is all about balancing depth and brightness.
| Ingredient | Amount | Notes |
|---|---|---|
| Ground Beef 🥩 | 2 lb | 80% lean, finely ground |
| Tomato Soup (canned) 🍅 | 2 cans | 19 oz each, smooth variety |
| Tomato Juice 🍅 | 1 cup | Low-sodium preferred |
| Onion 🧅 | 1 whole | Yellow or red, diced |
| Garlic Cloves 🧄 | 4 cloves | Minced or finely chopped |
| Chili Powder 🌶️ | 2 tbsp | Medium heat preferred |
| Ground Cumin 🌿 | 1 tbsp | Toasted for depth |
| Smoked Paprika 🌶️ | 1 tbsp | For smoky flavor |
| Salt 🧂 | 1 ½ tsp | Kosher or sea salt |
| Black Pepper 🌶️ | ½ tsp | Freshly ground |
| Beef Broth 💧 | 1 ½ cups | Low-sodium preferred |
| Dark Brown Sugar 🍚 | 1 tbsp | For subtle sweetness |
| Bay Leaves 🍃 | 2 whole | Remove before serving |
| Cocoa Powder 🍫 | 1 tbsp | Unsweetened, optional |
The tomato soup and juice are the stars here. Look for smooth, no-chunk tomato soup—it blends better and gives that velvety texture. Muir Glen or Campbell's are solid choices, but honestly any smooth brand works. The tomato juice? Low-sodium is key—you don't want to over-salt the whole pot. I usually grab mine from the store's refrigerated section—it's fresher than the shelf-stable cans. For the beef, 80% lean is ideal—it stays juicy while still browning well. If you're using pre-ground, pat it dry with paper towels before cooking to get a better sear.
No tomato soup? Substitute with 1.5 cups of crushed tomatoes plus 0.5 cup water, but you'll lose that silky texture. Ran out of tomato juice? Extra beef broth works in a pinch. Want more depth? Add 1 tbsp of molasses or 1 tsp of liquid smoke. The cocoa powder is optional but adds that rich, slightly bitter note—Hershey's Special Dark is what I keep on hand. If you're vegetarian, swap the beef for 1.5 lbs of lentils or 2 cans of black beans. The spices? Toast the cumin and chili powder in a dry pan for 30 seconds—it wakes up their flavors.
This chili tastes even better the next day—make extra for leftovers. Keeps for 4-5 days in the fridge or 3 months frozen. I like to freeze it in 2-cup portions for easy lunches. The flavors meld beautifully overnight, so don't rush it. If you're prepping for a crowd, double the batch—it reheats just as well. Top with avocado and cilantro right before serving, or serve with crusty bread or cornbread for soaking up every last drop.
Why You'll Love This Recipe
- Pantry Rescue: I swear by this when my fridge is bare—just open a can of soup, dump in the juice, and let the beef and onions do the work. No fancy shopping list, no last-minute grocery runs.
- Smooth & Silky Magic: That tomato soup base? It’s the secret weapon—no lumps, no scraping, just velvety richness that cuts through the beef’s richness. Honestly, my slow-cooker chili never tasted this consistent.
- Game Day Crowdpleaser: Between us, this is my go-to for tailgates or lazy Sundays because it’s hearty enough for 6 but easy to double. Serve it with cornbread, and suddenly you’re the MVP of any gathering.
- Leftovers That Beg: The flavor actually improves the next day—deepens, mellows, becomes this perfect balance of smoky and tangy. I’ll be real: I make extra just to have it for lunch.
Step-by-step instructions for chili recipe with tomato juice and tomato soup
This chili delivers deep, smoky flavor without needing extra cans—just follow these simple steps.
Brown the Ground Beef Perfectly
Heat a large Dutch oven or heavy pot over medium-high heat until hot. Add the 2 lb ground beef and break it apart with a wooden spoon, letting it sizzle and brown for 5-7 minutes. You want the beef to lose its raw color and develop a deep brown crust—this builds rich flavor. Don't rush this step; the beef needs time to render fat and develop texture.
Once browned, use a slotted spoon to transfer the beef to a plate, leaving all the rendered fat in the pot. This fat will become the flavor base for your chili. If you have more than 2 tablespoons of fat remaining, you can drain off the excess—just leave enough to coat the bottom lightly.
Sauté Onions and Garlic for Depth
In the same pot, reduce the heat to medium and add the 1 whole diced onion. Cook for 4-5 minutes until the onions soften and become translucent, stirring occasionally. This step ensures your chili has a sweet, caramelized foundation.
Add the 4 cloves minced garlic cloves and cook for another 30 seconds until fragrant. Garlic burns quickly, so keep an eye on it—you want aroma, not bitterness. At this point, you should notice the pot smells rich and savory, setting the stage for the spices to come.
Build the Spice Base
Stir in the 2 tbsp chili powder, 1 tbsp ground cumin, 1 tbsp smoked paprika, 1.5 tsp salt, and 0.5 tsp black pepper. Cook for 1 minute, stirring constantly, until the spices are fragrant and the mixture darkens slightly. This step is where the chili gets its signature depth and warmth.
Here's the thing—don't skip this toasting step. The spices need to bloom and release their oils, which creates that complex, layered flavor you crave in great chili. If you rush it, your chili will taste flat and one-dimensional.
Simmer the Chili to Perfection
Pour in the 1 cup tomato juice, scraping up any browned bits from the bottom of the pot. Add the 2 cans tomato soup, 1.5 cups beef broth, 1 tbsp dark brown sugar, 2 whole bay leaves, and 1 tbsp cocoa powder. Stir everything together until well combined.
Bring the mixture to a boil, then reduce the heat to low and let it simmer uncovered for 1 hour. Stir occasionally to prevent sticking, and taste after 30 minutes to adjust seasoning if needed. The chili should thicken slightly as it simmers, and the flavors should meld beautifully. The bay leaves will infuse subtle herbal notes, so remember to remove them before serving.
Finish and Rest for Maximum Flavor
After simmering, return the browned beef to the pot and stir to combine. Let the chili cook for another 10-15 minutes to heat the beef through and allow all the flavors to fully integrate. You'll know it's ready when the chili has a thick, velvety consistency and the beef is fully cooked.
Remove the bay leaves and let the chili rest for 10 minutes before serving. This resting period allows the flavors to settle and the chili to thicken slightly more. Serve hot with your favorite toppings—crumbled cheese, sour cream, or fresh cilantro all work beautifully. Enjoy your rich, smoky chili that's packed with deep flavor without needing extra cans!
Pro Tips For Making Chili Recipe With Tomato Juice And Tomato Soup
- Crank the Heat First: I used to simmer onions and garlic too gently, and the garlic ended up tasting like it was still raw—no one wants that. Instead, get that pan smoking for 2-3 minutes before adding anything else. The onions will caramelize faster, and the garlic will sing.
- Drain the Tomato Juice: That extra water in canned tomato juice is a sneaky flavor killer. After adding it, let the chili simmer uncovered for 10 minutes, then drain off about half the liquid. Your chili will be richer, not watered down—trust me, I’ve made this mistake twice.
- Brown the Beef Properly: Skip the partial-cooking shortcut and actually brown the beef in batches. A quick sear locks in flavor and prevents that sad, gray, undercooked look. Use a slotted spoon to drain excess fat halfway through, or you’ll end up with greasy chili.
- Stir in the Soup Last: Adding tomato soup too early turns your chili into a thin, soupy mess. Wait until the beef is browned and the onions are soft, then stir in the soup and juice. The acidity will brighten everything, and the texture stays thick—no sad, watery bowl here.
Flavor customization for this chili recipe with tomato juice and tomato soup
Spicy Kick Boost
For those who love heat, add 1-2 tbsp of cayenne pepper or 1-2 tsp of chipotle powder when toasting your spices. I like to use Penzeys brand for their consistent quality.
Start with 1 tsp and adjust to taste—chili can always use more heat, but it's harder to fix if it's too spicy. For a smoky-spicy combo, add ½ tsp of liquid smoke along with the chipotle. 🌶️
Sweet Heat Balance
Add 1 tbsp of molasses or 1 tsp of maple syrup to deepen the sweetness and balance the acidity from the tomato juice. This works especially well if you're using a lot of spice.
I keep a small bottle of Grandma's brand molasses in my pantry for this exact purpose. The molasses also adds a subtle caramel note that complements the smokiness beautifully.
Umami Depth
For an extra layer of savory flavor, stir in 1 tbsp of Worcestershire sauce or 1 tsp of fish sauce during the simmering stage. These additions add a complex, meaty depth that pairs perfectly with the tomato base.
I find that Lea & Perrins Worcestershire is the most balanced choice. If you're vegetarian, 1 tbsp of soy sauce works just as well for umami boost.
Herbaceous Freshness
Brighten the chili with 1 tbsp of fresh cilantro or parsley chopped at the end, or add 1 tsp of dried oregano during the spice toast. Fresh herbs add a vibrant finish that cuts through the richness.
I often add ½ tsp of dried thyme along with the oregano for an earthy note. For a Mediterranean twist, add 1 tsp of dried basil—it pairs surprisingly well with the smoky spices.
Acidity Adjustments
If your chili tastes too heavy, add 1-2 tbsp of apple cider vinegar or ½ tsp of lemon juice to brighten the flavors. This is especially helpful if you're using a lot of tomato soup, which can be quite rich.
I keep a small bottle of Bragg apple cider vinegar on hand for quick adjustments. A splash of vinegar also helps balance the sweetness if you've added molasses or sugar.
Texture Variations
For a creamier chili, stir in ½ cup of coconut milk or ¼ cup of sour cream during the last 10 minutes of cooking. This adds a silky texture that's perfect for serving. I like to use full-fat coconut milk for the richest result.
For a chunkier texture, add ½ cup of diced tomatoes or ¼ cup of corn kernels during the simmering stage. The contrast of textures makes every bite more interesting. 💫
Nutrition facts
Frequently asked questions
Why does this chili use both tomato juice and tomato soup?
The tomato juice adds bright acidity that cuts through the richness of the soup, preventing a heavy flavor. The soup provides natural thickness and depth without extra cans. Together, they create a velvety texture with balanced sweetness and tang. Think of it as the perfect marriage of body and brightness!
Can I make this chili vegetarian?
Swap the beef for 1.5 lbs of lentils or 2 cans of black beans. For extra protein, add 1 can of kidney beans or 1 cup of cooked quinoa. The tomato base works beautifully with plant-based proteins—just simmer the lentils or beans until tender before adding them to the chili.
How do I fix if my chili tastes too acidic?
Add 1 tbsp of molasses or 1 tsp of maple syrup to balance the acidity. If that's not available, a pinch of sugar or even a splash of ½ cup beef broth can help mellow the flavors. Stir well and taste again—you're aiming for a harmonious blend of sweet and tang.
Can I make this chili in a slow cooker?
Yes! Brown the beef first, then transfer everything to the slow cooker. Cook on low for 6-7 hours or high for 3-4 hours. The slow cooking enhances the smoky flavors even more. Just check occasionally and add a splash of broth if it gets too thick. Perfect for hands-off weeknight cooking!
What's the best way to store leftovers?
Let the chili cool completely, then transfer to airtight containers. It keeps in the fridge for 4-5 days or freezes beautifully for 3 months. For reheating, warm on the stove over medium-low heat or microwave in 1-minute intervals until steaming hot. The flavors actually improve overnight!